Photoshops default colour setting is RGB so always remember to change to CMYK when working for print. (subtractive colour) for print.
Higher Resolutions when scanning for images that you're enlarging.
300dpi for print
Cut off point for commercial print quality so no need to go any higher. WILL JUST GIVE MASSIVE DOCUMENT.
Filling an object.
Create a selection > use the colour picker on the right
> the fill bucket tool
> colour picker in top right
very similar to illustrator.
Here I have selected the colour picker and chosen a colour from within the colour range on the picker. This colour was from an RGB selection.
This shows how the colour looked on screen in the selected shape.
However when I changed the colour mode back to CMYK, below is how the colour came out. This is because the original selection was a colour that couldn't be recreated with CMYK. The small icon on the colour picker, with an exclamation mark lets you know that the colour is 'out of gamut' or out of the printing colour range.
Here we were looking at a detailed and colourful image. Cameras default in RGB because they work off the light through the lens creating an image. Below is the image as it looked on screen.
The image above shows the image after I had selected
view > gamut warning.
This helps to identify colours in an image that aren't printable.
The grey areas are those that can't, and as is quite clear, a lot of the colours in this image won't print.
We then looked at ways to rectify the problem of the out of gamut colours.
Above I was looking at altering hue, saturation and brightness... which will help but will have the same effect on the whole image, even those colours that can be printed... so it may be pretty dull.
It is possible to select the colours that are out of gamut and replace them using the colour picker, or selectively alter their values in order to keep the rest of the image as bright as possible.
As you drop the saturation of the select colours it is visible that the range of colours that are out of gamut drops as the areas covered in grey reduce.
This is what the image looked like after I had altered it so that all the colours were in the range that was possible to print. It is visibly duller, and there aren't as many extremes, so the contrast has had to be dropped back a bit, however it's a good compromise.
Swatch palette
Similarly to illustrator it is possible to edit your swatches so that you can keep colours consistent etc.
to remove swatches from the palette simply alt + click.
There is then the option to add whatever swatches you want.
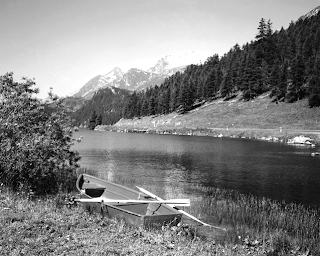
Above is the image in made grayscale. The image needs to be grayscale when it is brought into photoshop so it's possible to keep the colour mode of the document in CMYK. If the documents colour mode is grayscale, it won't be possible to apply spots or tones.
Selecting image > mode > duotone
allows you to edit the tones in the image
which are matched directly to those in the grayscale
for example 50% black = 50% of chosen spot colour.
Here is my first tone experiment, applying one colour, a pantone blue which replaces all the tones in the grayscale image.
I then went ahead and added a second spot, a dark red.
Using the duotone curve allows you to alter how the colour is applied to the image. Such as whether you want them to appear mixed colours or whether you want one colour to fill solely the lighter tones and the other the dark.
A few examples of differences created by altering the duotone curves and above is the image I eventually went with. It is clear that this type of image editing could create some really nice effects, very similar to processes such as solarizing, toning and dying, created when working in the darkroom with photographic prints.
Here I looked at the same blue spot, but altered the red to a blue green colour, and used a much more obvious form of duotone, mentioned above, in which the whites and lighter tones of the image, I have replaced with the green, and the dark tones with the blue. Could be interesting aswell, but probably with different colours.
There is also another way to apply spot colour to the image.
Applying spot colour using the channels
Channel menu > new spot channel
Above is the area of the image that I have selected to apply the spot to. similarly to applying a layer mask, the areas selected are full black on the channel menu. Using the red spot, it is applied directly to the selection as a colour overprint.
A view of the channel menu and the selection to apply the desired spot colour.
The image with the selectively applied spot colour using the colour channels.


No comments:
Post a Comment